Flooring: part 2 of 4
After removing the vinyl floor, I discovered some floorboards in the kitchen needed replacing. Not many, maybe seven or eight. It seemed so basic - after all, that’s just some measuring, sawing, drilling and screwing - but in combination, it was one of the more tedious renovation tasks I’ve done. Most jobs require either precision or working with large and heavy objects, this one needed both.
Know your floor first
My boards are 180 × 60cm, 22mm thick, laid over joists spaced at 60cm centres. This is a common standard in European construction, but check your house rather than assuming. The joist spacing matches the board width.
Boards can be placed both along and across the joists. Check which direction requires less cutting. Important: board edges should land on a joist, not dangle in the air.
Removing the old boards
This was the most time consuming and tedious part of the job.
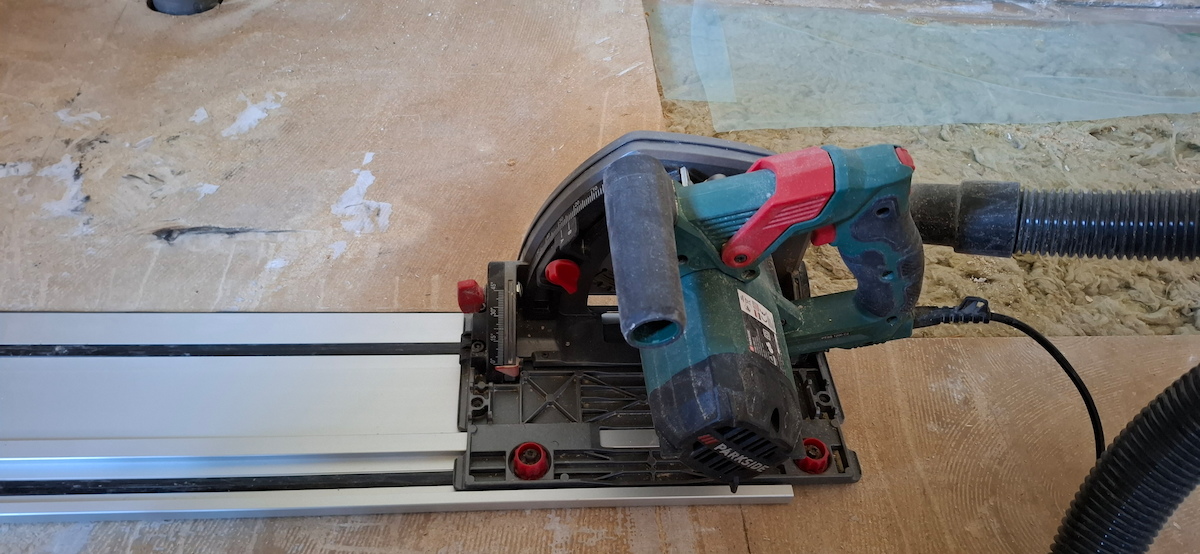
Cutting the boards out. A plunge saw set to exactly the board depth - 22mm in my case - cuts the board without touching the joists below. In the beginning I didn’t know where the joists where and some exploratory surgery was necessary. More importantly there may be pipes and cables running beneath the floor. A plunge saw you can set to a precise depth is the right tool here.
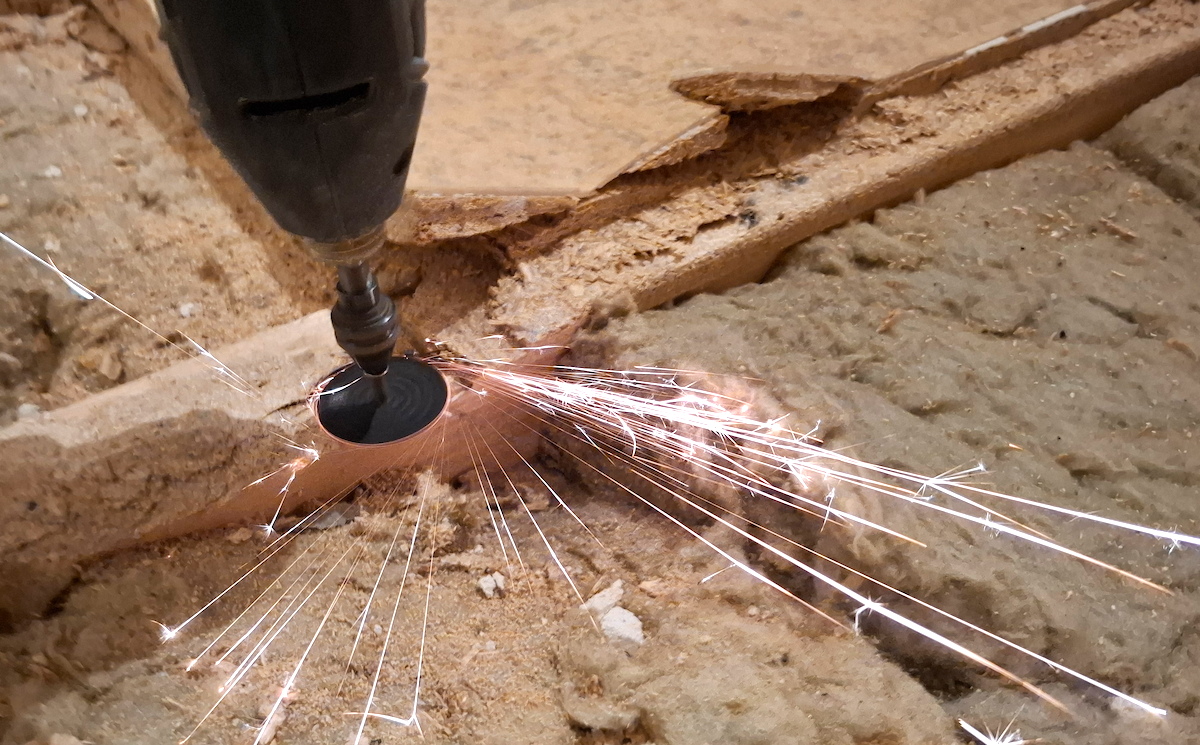
Getting the boards up. After getting some access, I tried to remove the boards. They were both glued and screwed to the joists. Most screws were easily removed with a drill/driver, or for more stubborn ones - an impact wrench. 2 or 3 snapped (impact wrench means something WILL be removed). I cut them flush using a rotary tool (I don’t know what they were made of, but multitool blade only got its teeth rounded).
The glue, applied by someone who clearly had an infinite supply, was the main task. The sequence that eventually worked: oscillating multitool with a saw blade along the glue joint to break the bond, then a prybar to lever the board up. Sometimes a sabre saw held horizontally if the board couldn’t be convinced to move. Then, once the board was off, a belt sander on the joist tops to remove the remaining residue.
At one point I counted 8 powertools. I didn’t know I even had that many.
Fitting new boards: dry run first
I made a mistake of glueing and screwing the first board. It then turned out I should have started from the other side to fit to the existing boards properly. I removed it (luckily I haven’t used as much glue as the original creator) and learned to lay all the new boards in position without fixing them. Discover problems before the glue is on, not after.
Fixing sequence: apply wood glue (construction adhesive, something flexible rather than rigid - floors move) to the joist tops, lay the board, drill pilot holes through the board and into the joist, then drive the screws. Countersink the pilot holes so the screw heads sit below the surface. Pilot holes are not optional here. Dry timber splits when you drive a screw without one, especially near the board edge over a joist.
The click edge problem
Modern floorboards typically have a click-lock profile on their edges - a tongue and groove system that snaps the boards together and keeps them aligned. This is fine when you’re laying a whole floor from scratch. It becomes a problem when your new boards meet old ones.
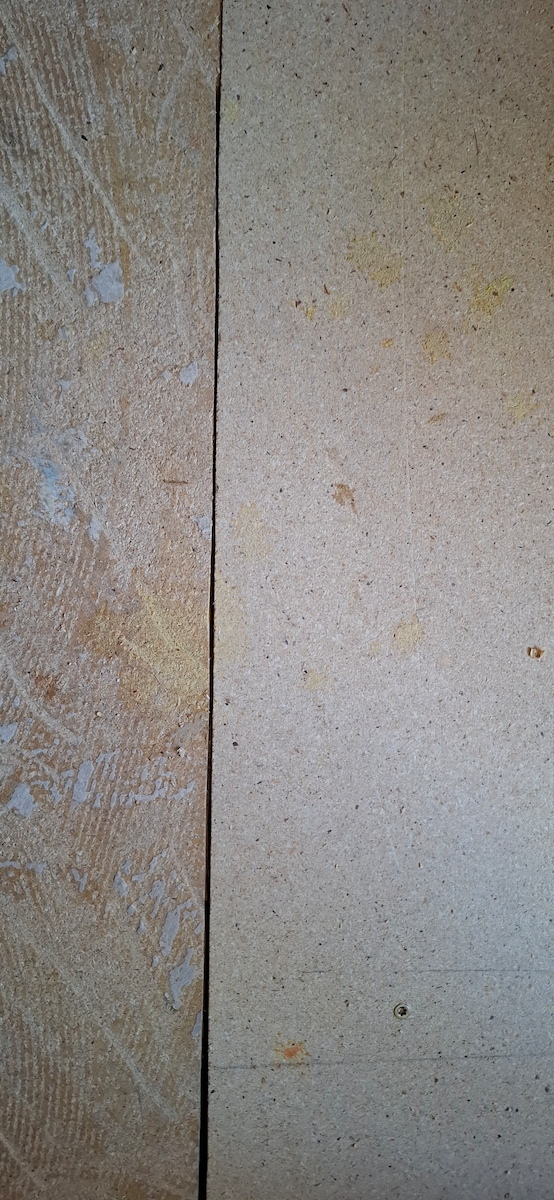
My replacement boards clicked together perfectly among themselves, so did the old ones. Where a new board met an existing old board, the profiles didn’t match - different manufacturer, different era. The solution was to cut the profile off the edge that meets the old floor, leaving a flat butt joint. I used my plunge saw again. A butt joint between floorboards is not as strong as a click joint - there’s nothing mechanical holding the two edges together, just the fixing to the joist below. In practice, if both boards are properly fixed to the joist at that point, the joint is stable enough.
Cutting
New boards in need of cut were clamped to my pallet workbench and treated with my trusty plunge saw on a track rail. This gives clean, accurate cuts. Far better than a freehand cut could achieve. I sometimes made small cuts in place, relying on the depth control again.
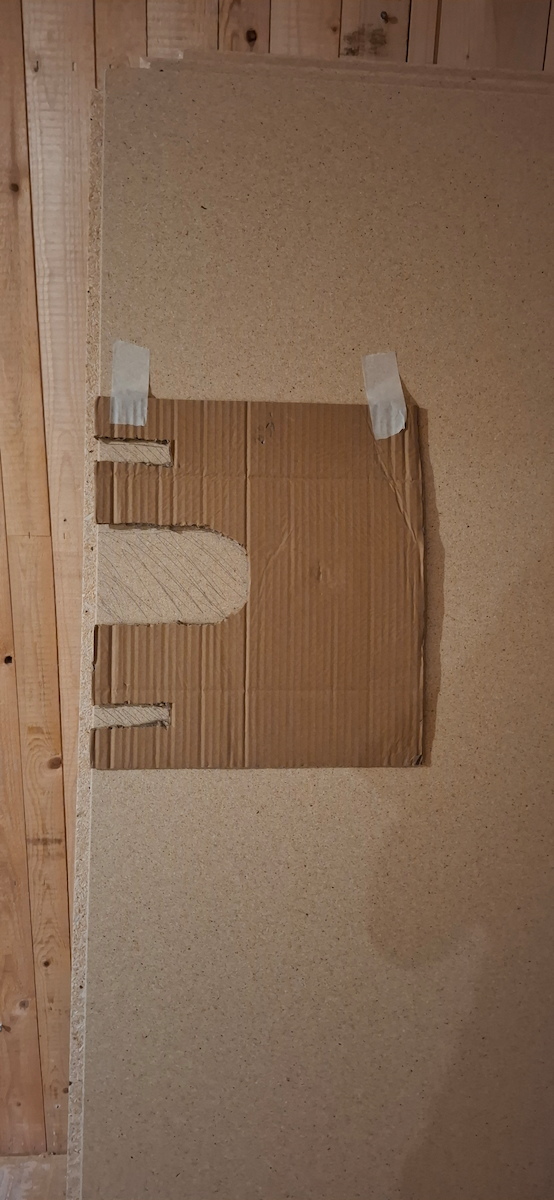
For complex cuts, I made cardboard templates. Where a board had to fit around a pipe or into an irregular corner, I cut a piece of cardboard to fit the space first, then transferred the shape to the board. I did these cuts using multitool, the plunge saw is only useful for straight lines. Not millimetre accuracy, but I didn’t need it.
There will be dust
Floorboard work generates an unreasonable amount of dust. The belt sanding of joists alone is enough to coat a room; the saws add more. A PM2.5 meter at times showed 400 μg/m3 (WHO recommends to keep it below 5 on average and not exceed 25). I used all the mitigations I could.
Shop vacuum connected to the tools. The plunge saw and the belt sander have dust extraction ports; the vacuum plugged directly into them caught the majority of cutting dust at source. This is the highest-leverage step - stopping the dust before it becomes airborne is much more effective. What it couldn’t catch was still enough to be a problem.
Dust mask throughout. Not just during cutting and sanding, the dust stays airborne for a long time.
Vacuuming everything. At the end of each session and throughout; whenever I saw some accumulation and especially before putting the new floorboard.
Air purifier running in the room. A HEPA purifier needs time to work, leave it running during work and for a few hours afterwards. And don’t forget to vacuum the filter every day. Home purifier wasn’t designed for these conditions, but it works anyway.
One thing I didn’t do well: sealing the workplace from the rest of the house. There was no door to the kitchen, I hang a few plastic sheets on the doorway without bothering to seal them properly (I wanted to move in and out without resealing). The result was what I should have expected: if I could find the way through the sheets, then dust particles - much smaller than me - also could.
The result
This is one of the bigger renovation jobs I’ve ever done, and one I don’t want to repeat for a while. The removal phase specifically - the glue, the prybar, the belt sanding of joists. The fitting phase was more fun, except for fitting new boards to old boards and making the complex shapes (I had to use the well-known approach: measure twice, cut three times).
Having it done by professionals would be a reasonable choice. A DIY job, unpleasant at times, was deeply satisfying when it ended.