Flooring: part 4 of 4
After removing the old floor and checking the subfloor, next step was to install something we like.
Choosing panels
Apart from the look, the main decision criteria were low emissions and durability, roughly in that order. We ended up with two types, but with similar features.
Emissions mattered because laminate flooring is a product that spends its entire life slowly releasing whatever volatiles are in the resin and backing into the room you’re living in. Our panels have low-emission certification.
Durability: The AC (Abrasion Class) scale goes from AC1 (residential light use) to AC6 (commercial heavy). The panels we chose are rated AC4 - commercial moderate - which means in a house they should last for years.
For the bedrooms and living room, we chose Myfloor Palais and for the kitchen - Classen Visogrande. The main difference was in the look. Room panels are large (1380 x 193mm) and imitate wood, kitchen panels (604 x 280mm) resemble stone. Both are made in Germany, which I think gives a slightly higher chance that their ratings are real.
Before you start
Acclimatisation. The packs need to sit in the room at normal temperature and humidity for at least 48 hours before laying. This lets the planks stabilise dimensionally before they’re locked together. My boards waited much longer than that, while I removed the old floor and did other things.
Subfloor condition. Laminate needs a flat subfloor - within 3mm per 2m is the standard tolerance, though tighter is better. We have chipboard subfloors that are generally flat, but we had to fill a few gaps with wood filler.
In a previous house, we had concrete subfloors. They need a moisture test and possibly drying - especially newly made, but even older concrete can be damp in ground floor installations.
Underlay. Options are foam or cork. Cork gives a bit of extra thermal insulation and sound dampening, foam is cheaper and more resistant to moisture. We used cork for bedrooms and foam elsewhere. Both come in rolls. Put them right before laying panels, they tear easily.
Planning the layout
Decide on direction first. Standard recommendations are to go parallel to the longest wall and to the main light source if possible - in some rooms these were opposite requirements. If in doubt, try both ways without installing them properly, or use visualisation app, or browse through example photos.
Unless you’re very lucky and your room width is an exact multiple of plank width, you’ll have to cut planks for the last row (I was lucky in one room). If you only need a few centimetres, it won’t look good. In that case, make both first and last row narrower. A little arithmetic before starting saves you from rearranging the whole room later.
Remember there will be expansion gap at all walls and other fixed objects (door frames, pipes). 10 to 15mm recommended. The floor isn’t fixed to the subfloor, it needs space to expand or it will crack. Take it into account when planning the layout. It actually makes your life easier - since it doesn’t need to be exactly the same width, there is some wiggle room when planning. The gap gets covered by skirting board or trim, so it’s invisible in the finished floor.
If you use the same panels all over the house, decide whether you want to split in doorways or make a continuous run. Continuous looks great, but are harder to plan and install. If you make a mistake and need to rearrange… well, plan for more installation time and more foul language.
Cutting the panels
Some panels can be easily cut with a Stanley knife - just scratch along the ruler and it breaks cleanly. Not this type, apparently. The panel is thick, layers tend to break in different places.
Manufacturer recommends a hand saw. What is it, 18th century? I tried my favourite plunge saw on the track. Special fine-tooth blade should be used for laminate material, but I thought I might get away with a standard wood-cutting blade (and it wasn’t even a new one). Result: clean and fast cuts. Perfect! I would even accept jagged cuts - they will be at the expansion gaps, it doesn’t matter if the edges are rough or if they’re a few millimetres off.
Laying the panels
Start in one corner of the room and make one full row. Remember about the expansion gap - there are special plastic spacers, if you forgot to buy them (I did), improvise. Planks attach to each other with an angle-click system. Put one board on the floor, hold the next one at around 45° and attach the edges. There should be no gap and the boards should be attached firmly (though on short edges, they often detach easily). At the end of the room, you’ll have to cut the plank to length - be careful to cut on the right side. Keep the off-cut, you’ll need it.
Start the next row with an off-cut plank. That’s because the joints need to be staggered by at least 1/4 - 1/3 of the length (check manufacturer’s recommendation). If the joints line up, the floor is structurally weak, it also looks wrong. The pattern should be random, which is where you can use off-cuts from previous rows. If you plan it carefully, you’ll only have very little waste.
Now check the manufacturer’s instructions (actually, you should have done that first instead of trusting some random guy on the internet). In our case, one type of panels required to make full next row just like the first one, than connecting two rows. Depending on the row length, you’ll need two or more people. You need to lift the second row at an angle and attach it to the first one. First tries are frustrating - the planks will detach, the edges won’t click. You need a few tries. The other type was much easier to work with. For the next row, you slide individual panels, one by one.
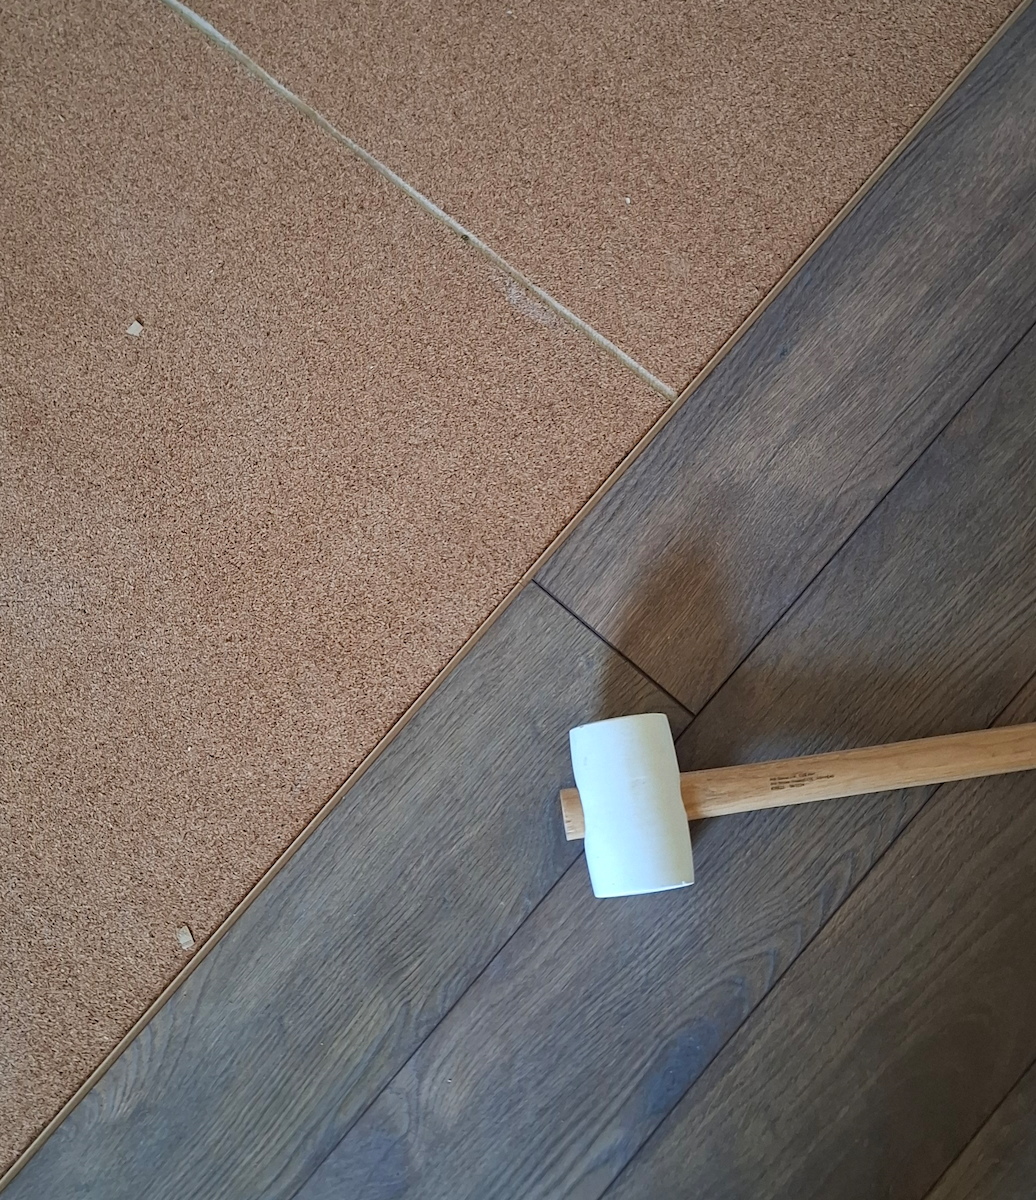
Properly connected, the panels should sit with a barely visible edge and almost flat. If that’s not the case, disconnect and reconnect. Use a rubber mallet to make them completely flat. You’ll gain experience quickly, before you cover half of the 1st room you’ll be much faster.
Problem points
As is usual with surface jobs - replacing floors, insulating walls etc. - 90% of the surface takes 10% of efforts. The endings, doorframes, pipes etc. take most of the time and planning.
Irregular shapes for doorways and such are more problematic than straight cuts. I used a saw blade on my oscillating multitool. Be careful, the tool vibrates and can jump on the surface, scratching the plank. Turn it on before it touches the surface, hold it firmly, touch with the corner of the blade first and then press down. If it’s the first time, practice on an off-cut. If your shape is especially complicated, use a contour gauge or cut a cardboard template to transfer the shape.
In our case, Myfloor was again quite straightforward, while Classen blunted the blades at a crazy rate. It only took a few seconds until smoke appeared and saw teeth disappeared. I tried a hacksaw and also grinded down the teeth. I finished the first cutout using a metal cutting disc on a rotary tool, taking care not to set the wood on fire. Then I ordered diamond discs. These worked much better. On the other hand, it probably means the abrasion resistance rating was real.

Result
The floor went down without any structural problems. The clicks are firm and there’s no flex underfoot anywhere. I might turn pro if I’m bored with my IT job. That is, if I forget how annoying it is to connect long rows.